
The 3D furniture design process essentially is a part of 3D modeling. 3D modeling essentially helps us in product prototyping, product promotion, and eventually product sales.
Why is the 3D Furniture Design Process Gaining Significance Years-after-Years?
It is not a trivial question though it is an important one. It is related to the advent of technology and our positive attitudes towards it.
For years, engineers were drawing 2D furniture designs on paper sheets and some 3D-looking views to convey their concepts on paper. Poor clients have to rely on these 2D drawings to look like 3D.
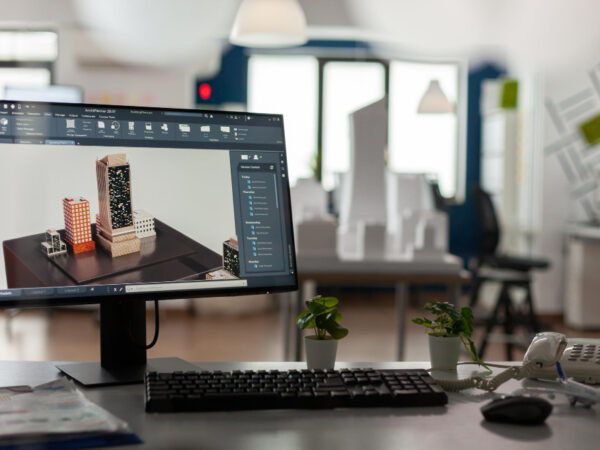
CAD or computer-aided designing software has changed the entire scenario. Now, engineers and 3D modeling experts are first creating 2D CAD drafts. Based on that modern 3D modeling software is creating a 3D model.
It is nothing but a simulation of real-product engineers wish to show to the clients.
In a 3D model, you can find depth along with length and width. You can see the surface texture. You can find object materials. Thus, you can see myriads of different attributes in the model’s property.
It allows you to compute various calculations or formulas, including cost estimation, quantity, various physical properties strength, bending capacities, and so many things beyond your imagination.
Now, you know the importance of your 3D modeling process in product engineering. The next thing to know is how to enhance the speed of the entire 3D modeling design process.
For the same, I would like to suggest to you the top ten ways to speed up the 3D modeling design process. Remember, these tips are based on the practical experiences of many 3D furniture design and modeling professionals.
It is an extract of experiences gained by the team of product engineers working in the industry.
Top 10 ways to speed up the 3D furniture design process.
First, I would like to list the ten ways that I think are important to speed up the 3D design process for any service or product.
- Design concept with brainstorming
- Technical details gathering
- Prototyping
- Decoration and lighting
- Selected PoV (Point-of-View)
- Pre-rendered 3D models
- Use appropriate background
- Do a quick test before launching the product
- Allocate more experts on the project
- Hire a 3D modeling studio
#1 – Design Concept With Brainstorming
Developing a perfect design concept in your mind means you’ve done the best part of the 3D modeling, without proper imagination in your mind, how can you translate any idea into reality?
In due course, you need to go through rigorous brainstorming sessions with your client. Extract all within the client’s mind. The next step would be your market research on ultimate competitors who are producing the same category of furniture.
You also should know the end-users of the products/furniture. Other aspects include the ergonomic design, availability of ready-to-use 3D furniture models or their parts for 3D modeling, and a rough sketch on paper.
#2 – Technical Details Gathering
After proper conceptualization, you need to accumulate various technical details regarding your furniture products to create an accurate and production-ready prototype. The needed technical details are:
- Dimension – length, width, and depth of each element.
- Layout
- Materials involved in production viz. Woods, metals, fur, or synthetic materials (PVC, resin, etc.)
You also need to decide which units will work the best. Imperial or Metric?
#3 – Prototyping
After gathering technical details, it is time to implement those parameters in your 3D models of the furniture assembly. Here, you have the scope to prepare design options in 3D CAD models and show your client to select the best option.
You should have complete knowledge of different types of 3D viewers. You must know how to convert your simulated models into proper file format so clients also can see those in their devices by installing that viewer.
Those viewers are based on VR technologies and need some familiarity with using a combination of mouse and keypad in large devices. However, mobile device-based viewers are easy thanks to the touch screen.
It is possible only when your client is tech-savvy and knows how to move an object in a 3D viewer. Otherwise, you can send in image or PDF formats. For the same, you need to take images from different angles or perspectives.
#4 – 3D Ambiance via Decoration and Lighting
CGI experts have technical knowledge of different types of natural and artificial lighting we use in daily life. For instance, the angle of the Sun or Moon, light intensity, and light colors.
These all are essential to creating an ambiance through decoration and lighting modules. Expert 3D modelers must know which value they have to enter in the parametric modules or property modules.
Most of the time, you need to combine you’re commonsense with technical knowledge and try experiments to get the correct rendering of ambiance in CAD software as well as in printings.
#5 – Selected PoV (Point-Of-View)
We discussed before that you can show your 3D model of furniture products from different perspectives or points of view. Those perspectives would be front, back, right, left, top, and bottom as elevations.
Top-right, bottom-right, top-left, bottom-left, etc. are some known 3D angles.
Remember, you must have some restraints using PoVs while doing 2D or 3D printing. Limited and industry-known angles are enough to showcase your prototypes to the clients.
It is because too many options and angles can confuse your client to make the right selection.

#6 – Pre-rendered 3D Models
3D object rendering on 3D Max or Maya like 3D rendering software is an extremely time-consuming process. Therefore, taking a low-quality preview before the final rendering can help you a lot. Revit provides such facilities for architectural or construction products or services.
Other 3D software also offers preview mode or low-quality rendering before finalizing the 3D rendering.
#7 – Use Appropriate Background
If you are not creating prototypes of the product or going to render the 3D furniture, you have ample scope to use a simple or white background.
It will help you save time and your client can make a selection without feeling distracted by the fancy-like backgrounds.
When it is time to create a final prototype, or product, or go to 3D rendering with appropriate ambiance, you need to add a background to show interior or exterior design as ambiance.
#8 – Do a Quick Test Before Launch The Product
If you are working on a millwork project, it is essential to create sample products before finalizing the CNC machining or going to assembly machining.
By preparing samples from original materials, sizes, and shapes of furniture products, you can save a lot once you accomplish the millwork or CNC assembling.
For legitimate testing, you can depend on the entire team of furniture design to produce their test results. Similarly, you can bring real users or client-team to the studio and let them test the furniture products before the final production process.
#9 – Allocate More Experts On The Project
If you are short of time or working with a deadline, you need to add more experts at a time in the project. However, it could be a costly affair and you can use it only in an emergency.
#10 – Hire 3D Modeling Studio
After getting knowledge regarding the technical aspects involved in the 3D modeling process, you might be convinced that you need to hire a 3D modeling studio like Shalin Designs. They have adequate tools, expertise, and experience to deal with the complicated 3D modeling process.
Shalin Designs is a destination where you can get your 3D modeling process done within your budgetary and time constraints.

